Hey everyone!
I've noticed some of you still struggle with some anatomy approaches in your art. Since this is such a complex topic, today I wanted to share some key points in which you can categorize essentials of anatomy, in other words, the necessary stuff to convey a good character design illustration. Without further ado, let's dive in
1. Proportion Inconsistencies
One of the most common challenges in character design is maintaining consistent proportions. Whether it's the relative size of the head to the body or the length of limbs, slight variations can cause your character to look off-balance or unnatural.
When tackling proportion inconsistencies, it's essential to establish a reliable framework for the character. Here's a step-by-step guide:
- Foundation with Shapes: Begin by mapping out your character using basic geometric shapes. These shapes act as placeholders for body parts, ensuring you're not going off-scale as you detail.
- Head: Start with an oval or circle. This serves as the reference point for the rest of your character. For example, in a traditionally proportioned human, the body is usually about 7.5 heads tall.
- Torso: Use two rectangles — one for the chest and another for the pelvic area. By doing this, you can visually check the torso's length and ensure it's neither too stretched nor compressed.
- Limbs: Visualize arms and legs as series of cylinders. Break them down into sections: upper arm, lower arm, thigh, and shin. This modular approach allows you to maintain consistency in limb lengths. For instance, a typical human's elbow reaches the waist, and the wrists align with the crotch.
- Hands and Feet: Simplify hands into a rectangular palm with elongated ovals for fingers. For feet, start with a triangle or wedge shape, ensuring it's appropriately sized in relation to the legs.
- Measure & Cross-Check: Periodically measure body parts against one another. For instance, the hand (from base of the palm to tip of the middle finger) typically reaches from the chin to above the eyebrows on a face.
By continuously referring back to these foundational shapes as you refine and detail your character, you ensure that the anatomy stays proportionally accurate throughout the drawing process.
2. Static Poses
Characters that are drawn in static, straight-on poses can come off as dull or lifeless. Dynamic characters require dynamic poses to bring them to life.
Dynamic poses are key to conveying motion, emotion, and intent in character design. To breathe life into static poses, it's crucial to understand the core principles of movement and balance. Here's a comprehensive breakdown:
- Line of Action: The very foundation of a dynamic pose is the line of action. Visualize this line as the spine or backbone of your pose. It's a fluid curve that dictates the primary movement of the character. By exaggerating this curve, you can amplify the energy or tension in the pose.
- S-Curve & C-Curve: These are the primary shapes of the line of action. An S-Curve implies a relaxed, casual stance or a more fluid motion, while a C-Curve often indicates a stronger, direct action or an extreme emotion.
- Balance & Counterbalance: In real life, for every action, there's a reaction. For a character leaning far to one side, there's usually a leg, arm, or another part of the body acting as a counterbalance. Understanding this helps in making dynamic poses that still feel grounded and realistic.
- Pushing the Pose: After establishing a basic pose, try pushing it further. Exaggerate bends, twists, and stretches. Often, the first pose you draw is a bit reserved, and by pushing it, you can uncover a more dynamic and engaging stance.
- Silhouette Test: A clear silhouette ensures that, even in high action poses, your character remains recognizable and the pose understandable. You can test this by filling in your character with a solid color and seeing if you can still comprehend the pose and action.
- Secondary Action: Elements like flowing hair, a fluttering scarf, or the trail of a cape can add to the dynamism of a pose. These elements follow the main action but can provide contrast and enhance the primary movement.
By incorporating these principles into your drawing process, you not only break away from static poses but also create characters brimming with life, energy, and intention.
3. Lack of Depth in Features
Flat or two-dimensional features can make your character look lifeless and unrelatable.
To transform a flat character sketch into one that radiates depth and realism, it's essential to understand and effectively apply principles of perspective and shading. Here's a comprehensive guide:
- Perspective in Facial Features: Facial features aren't flat; they protrude or recede from the face. For example, the nose often projects outward, while the eyes are set deeper into the skull. When the character turns or tilts their head, these features should shift in accordance with the perspective. Utilize vanishing points and horizon lines even when sketching the face to ensure that features are aligned correctly and appear in the right depth.
- Body Parts in Perspective: When drawing arms, legs, and other body parts extending towards or away from the viewer, remember to foreshorten. Foreshortening involves adjusting the size of objects (like limbs) to convey depth. An arm reaching towards the viewer should appear larger at the hand and decrease in size as it connects to the body.
- Shading for Depth: Light behaves in a predictable manner, casting shadows and creating highlights. Understand your light source's direction and intensity. The side of the character facing the light source will have highlights, while the opposite side will be in shadow. The transition between light and dark, known as the "core shadow," is crucial for conveying the form's roundness.
- Ambient Occlusion: In areas where two surfaces meet, like the armpit or where the neck meets the collar, there's often a soft gradient shadow known as ambient occlusion. Adding this detail can drastically increase the sense of depth.
- Reflected Light: Surfaces in shadow might still catch some indirect light, called reflected light. For instance, if a character stands near a bright red wall, the shadowed side might have a subtle red tint. This detail, while minor, can make your character feel more integrated into their environment.
- Texture and Specularity: Different materials reflect light differently. A shiny leather jacket will have sharp, high contrast highlights, while a cotton shirt will have softer, diffused highlights. By adjusting the sharpness and intensity of your shading, you can suggest different materials and textures, adding another layer of depth and realism to your character.
By integrating these detailed techniques into your drawing process, your characters will transition from flat, two-dimensional sketches to vibrant, three-dimensional entities, embedded in and interacting with their surroundings.
Homework Exercise: Anatomy Practice
Choose a full-body image of a person from a magazine, online source, or any reference. It can be static or dynamic.
- Breakdown: Start by breaking down the image into basic geometric shapes. This will help you understand the basic structure.
- Dynamic Posing: Try to redraw the same character but in a different, dynamic pose. Remember the line of action and how it can guide the pose.
- Depth and Shading: Finally, focus on one particular feature (like the nose or an arm) and draw it from three different perspectives: front, side, and three-quarter view. Add shading to give it depth.
Conclusion
Understanding anatomy in character design means really getting to know how bodies move and look from all angles. The more you draw, the better you'll get at it. It's like learning a new language; at first, it might be tricky, but with time, it becomes second nature. Keep practicing, keep exploring, and most importantly, have fun with it. From this point is UP ONLY!
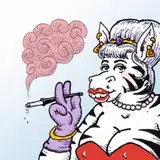
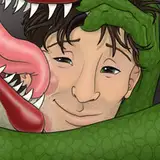
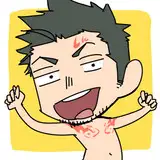
If you are part of the Mastering Maestro tier or above, tomorrow I'll be sharing the file of today's illustration along with the full-length video process and more insights about my approach. This time, I went a bit crazy with 4 characters, so there is a lot to share.
.
Welcome to all new patrons. Feel free to drop any questions here in the comments, via DMs here on Patreon, or in our Discord group. I'll be more than happy to answer and see your progress.
For more information, check out our Patreon FAQ: https://ramonn90.myportfolio.com/faq and Patreon Catalogue: https://ramonn90.myportfolio.com/work
Thank you for your support!